Home Insulation Guide 2025: Types, Costs & Where to Start
Nobody gets excited about insulation. Solar panels look futuristic. Heat pumps feel like real technology. Insulation is just... pink stuff in your attic.
But here's what the energy industry knows that homeowners often miss. Insulation upgrades frequently deliver the fastest payback of any home energy improvement. Faster than solar. Faster than new HVAC. Boring? Maybe. Effective? Absolutely.
This guide covers what you need to know.
Why Insulation Matters More Than You Think
The average home loses 25-30% of its heating and cooling through poor insulation. Your furnace or AC works constantly to replace energy that's literally escaping through your walls, roof, and floor.
Adding insulation is like plugging a leak. You're not generating more heat or cold—you're keeping what you've already paid for.
The numbers are straightforward:
- Attic insulation upgrade: $1,500-$3,500
- Annual energy savings: $300-$600
- Simple payback: 3-8 years
Compare that to solar panels with 8-12 year paybacks or heat pumps at 10-15 years. Insulation often wins on pure economics.
Where Heat Escapes (And Where to Insulate)
Attic: The Big One
Heat rises. In winter, it rises right through your ceiling and into your attic, then out through your roof. In summer, a scorching attic radiates heat down into living spaces.
Up to 25% of home energy loss happens through inadequate attic insulation. It's the single most impactful upgrade for most homes.
Target R-value: R-38 to R-60 depending on climate zone. Many older homes have R-19 or less.
Walls
Exterior walls account for 15-25% of heat loss. But wall insulation is harder to add after construction.
Cavity walls: Can be filled with blown-in insulation through small holes. $1-$2 per square foot.
Solid walls: Require interior or exterior insulation systems. Much more expensive and invasive. $8-$15 per square foot.
Basement and Crawl Space
Often overlooked, but floors over unheated spaces lose significant heat. Cold feet in winter often indicate insufficient floor insulation.
Rim joists (where the floor meets the foundation) are particularly leaky. Spray foam here provides excellent results.
Ductwork
If your ducts run through unconditioned spaces (attic, crawl space, garage), they leak conditioned air and absorb ambient temperatures. Duct insulation and sealing can improve HVAC efficiency by 20-30%.
Types of Insulation
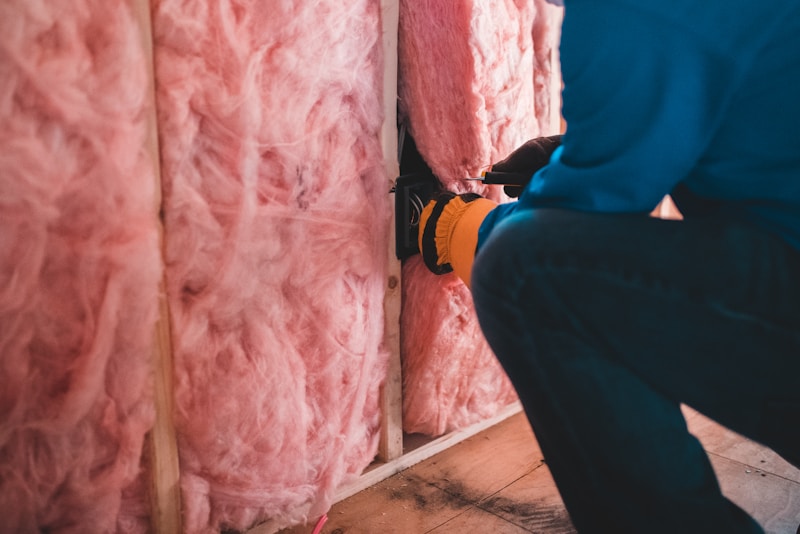
Fiberglass Batts
The pink or yellow stuff you picture when someone says "insulation."
Pros:
- Cheapest option
- DIY-friendly for attic floors
- Widely available
Cons:
- Leaves gaps if not installed perfectly
- Performance degrades if compressed or wet
- Doesn't air seal
Cost: $0.50-$1.00 per square foot installed
R-value: R-3.1 to R-3.7 per inch
Blown-In Fiberglass or Cellulose
Loose-fill insulation blown into attics or wall cavities.
Pros:
- Fills irregular spaces and gaps
- Better coverage than batts
- Good for existing homes (less invasive)
- Cellulose is made from recycled paper
Cons:
- Can settle over time
- Requires professional equipment
- Doesn't air seal
Cost: $1.00-$2.00 per square foot installed
R-value: R-2.2 to R-3.8 per inch
Spray Foam
Liquid foam that expands and hardens. Two types: open-cell and closed-cell.
Pros:
- Air seals as it insulates
- Highest R-value per inch (closed-cell)
- Excellent for irregular spaces, rim joists, and gaps
- Closed-cell adds structural strength and moisture barrier
Cons:
- Most expensive option
- Must be professionally installed
- Off-gassing during installation (temporary)
- Can cause moisture issues if not detailed correctly
Cost:
- Open-cell: $1.00-$1.50 per square foot per inch
- Closed-cell: $1.50-$2.50 per square foot per inch
R-value:
- Open-cell: R-3.6 per inch
- Closed-cell: R-6.5 per inch
Rigid Foam Board
Foam panels (XPS, EPS, or polyiso) used for exterior walls, basement walls, and under concrete.
Pros:
- High R-value per inch
- Moisture resistant
- Good for exterior applications
Cons:
- Needs to be covered (flammable, UV-sensitive)
- Joints need sealing
- Not flexible for irregular spaces
Cost: $0.50-$1.50 per square foot for materials
R-value: R-3.8 to R-6.5 per inch depending on type
What Insulation Do You Need?
Climate Zones
The Department of Energy divides the country into climate zones with recommended R-values:
| Zone | Attic | Floor | Wall Cavity |
|---|---|---|---|
| 1-2 (Hot-humid/dry) | R-30 to R-49 | R-13 | R-13 to R-15 |
| 3 (Warm) | R-30 to R-60 | R-19 | R-13 to R-15 |
| 4 (Mixed) | R-38 to R-60 | R-19 to R-25 | R-13 to R-21 |
| 5-8 (Cold to Very Cold) | R-49 to R-60 | R-25 to R-30 | R-13 to R-21 |
Checking Your Current Insulation
Attic insulation is easy to check. Take a ruler up there and measure depth. If you have less than 10-12 inches of fiberglass or cellulose, you're probably under-insulated.
Wall insulation is harder to assess. An infrared camera (or a professional energy audit) reveals cold spots indicating missing insulation.
Cost to Insulate Different Areas
| Area | Method | Cost Range |
|---|---|---|
| Attic (1,000 sq ft) | Blown-in | $1,000-$2,500 |
| Attic (1,000 sq ft) | Spray foam | $3,000-$6,000 |
| Wall cavities (1,000 sq ft) | Blown-in | $1,500-$3,000 |
| Basement walls (500 sq ft) | Rigid foam + framing | $2,000-$4,000 |
| Rim joists (100 linear ft) | Spray foam | $400-$800 |
| Crawl space (500 sq ft) | Batts or spray foam | $1,000-$3,000 |
The Federal Tax Credit
Insulation qualifies for the 25C energy efficiency tax credit:
- 30% of material costs (not labor)
- Annual cap of $1,200 (combined with other 25C improvements)
- Expires December 31, 2032
On a $2,000 insulation project (materials portion: $800), you'd get $240 back. Not huge, but it helps.
DIY vs. Professional Installation
Good DIY Projects
- Adding batts to an accessible attic floor
- Insulating behind outlet and switch plates
- Adding weatherstripping and caulking
- Insulating water heater and pipes
Better Left to Professionals
- Blown-in insulation (requires equipment)
- Spray foam (requires equipment and expertise)
- Wall cavity insulation
- Any work near electrical panels or fixtures
- Attics with limited access or hazards
Prioritizing Your Upgrades
If you're working with a limited budget, here's the typical priority order:
- Air sealing: Caulk, weatherstrip, and seal obvious gaps. Often free or cheap. Highest impact per dollar.
- Attic insulation: If below R-30, adding insulation pays back quickly.
- Duct sealing and insulation: If ducts are in unconditioned space.
- Rim joist insulation: Easy wins with spray foam or rigid foam.
- Wall insulation: If cavities are empty and budget allows.
- Basement/crawl space: Depending on climate and home configuration.
Getting Started
Before spending money, get an energy audit. Many utilities offer free or subsidized audits. A professional will identify your biggest opportunities and help you prioritize.
Then get quotes from insulation contractors. Compare at least three. Make sure they specify R-value, square footage, and exactly what's included.
Don't forget to check for utility rebates. Many utilities offer $100-$500+ for insulation upgrades. Combined with the federal credit, you can offset a meaningful portion of costs.
The Bottom Line
Insulation isn't glamorous, but it's often the smartest first step in home energy improvement. Better insulation makes every other system—heating, cooling, solar—work more effectively.
If you're planning solar or a new HVAC system, check your insulation first. You might find that a $2,000 insulation upgrade reduces your heating and cooling needs enough to downsize other equipment. That saves money twice.
Start with an energy audit. See where you're losing heat. Then plug those leaks before you invest in generating more.
Common Insulation Mistakes to Avoid
These are the errors that waste money or create problems:
Insulating Without Air Sealing
Insulation slows heat transfer. Air sealing stops air movement. You need both. Insulating over gaps, cracks, and holes is like wearing a sweater with the zipper down. Seal first, then insulate.
Compressing Insulation
Fiberglass batts get their R-value from trapped air. Compress them and you crush the air pockets, reducing effectiveness. If batts don't fit the cavity, don't force them. Get the right size or use blown-in insulation instead.
Ignoring Vapor Barriers
In cold climates, warm moist indoor air can condense inside wall cavities when it hits cold surfaces. Vapor barriers on the warm side of insulation prevent this. Putting vapor barriers on the wrong side causes the very moisture problems you're trying to prevent.
DIY Spray Foam
Professional spray foam installation requires training and expensive equipment. DIY spray foam kits exist but often result in poor adhesion, gaps, and wasted material. For small touch-ups they're fine. For significant areas, hire professionals.
Blocking Ventilation
Attics need ventilation to prevent moisture buildup and ice dams. When adding attic insulation, don't block soffit vents. Use baffles to maintain airflow channels from soffits to ridge vents.
The Insulation Upgrade Process
Here's what to expect when you hire professionals:
Energy Audit (1-2 hours)
An energy auditor inspects your home, often using blower door tests and infrared cameras to find air leaks and insulation gaps. You receive a prioritized list of recommendations.
Getting Quotes (1-2 weeks)
Contact 2-3 insulation contractors. They should visit to assess conditions and provide detailed proposals specifying R-values, square footage, and materials.
Installation Day
For attic blown-in insulation, crews typically complete a standard home in 3-6 hours. They'll protect your living space, blow in insulation to the specified depth, and clean up. Wall cavity fills take longer—typically a full day for a whole house.
Verification
After installation, verify the depth and coverage matches the proposal. For attic work, stick a ruler into the insulation at several points. Measure and document.
Results
You won't see dramatic differences immediately. Changes show up on heating and cooling bills over subsequent months. Track your energy usage before and after to quantify savings. Most homeowners report 15-25% reductions in heating and cooling costs after comprehensive insulation upgrades.
Insulation is the quiet foundation of home energy efficiency. It works invisibly, every hour of every day, keeping heat where you want it. There's no app to check, no maintenance schedule to follow—just lower bills and more comfortable rooms. That's the kind of investment that pays dividends for decades.