Home EV Charger Guide 2025: Levels, Costs & Installation Explained
You bought an electric car. Congratulations. Now you're staring at charger options wondering if you actually need to spend $2,000 on something that plugs into your wall.
Short answer: maybe. Long answer: it depends on how you drive, what your electrical setup looks like, and whether you value convenience over cost savings.
Let's walk through this properly.
Understanding Charging Levels
Level 1: The Basic Option
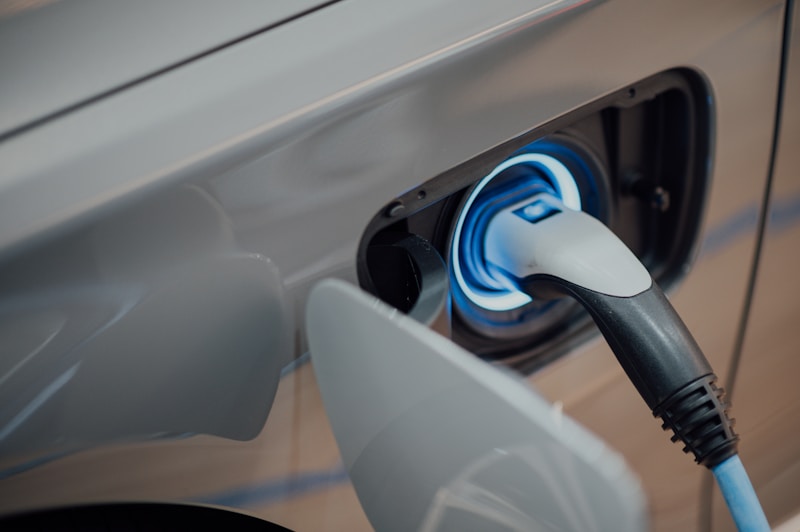
Every EV comes with a Level 1 charger. It's the cable with a standard 120V household plug on one end and your car's charging port on the other.
Here's what Level 1 delivers:
- 3-5 miles of range per hour of charging
- 40-50 miles of range overnight (12 hours)
- No installation cost—just plug into any outlet
- Works anywhere with a standard outlet
For many drivers, Level 1 is enough. If you commute 30 miles daily and park in a garage with an outlet, you're set. Plug in overnight, wake up with more range than you need.
Level 1 falls short if you drive 80+ miles daily, need quick turnaround between trips, or don't have reliable overnight access to an outlet.
Level 2: The Sweet Spot
Level 2 chargers use 240V—like your dryer or oven. They deliver 20-35 miles of range per hour, depending on amperage and your car's onboard charger.
Numbers that matter:
- 240V at 32 amps: ~25 miles/hour
- 240V at 40 amps: ~30 miles/hour
- 240V at 48 amps: ~35-40 miles/hour
A completely depleted 300-mile EV battery charges fully overnight. Even a partial recharge happens during dinner.
Level 2 makes sense if:
- You drive 50+ miles daily
- You want the flexibility to leave with a full battery anytime
- Multiple EVs share one charger
- You plan to use time-of-use rates for cheap overnight charging
Level 3: DC Fast Charging
DC fast chargers aren't home equipment. They're commercial installations costing $50,000+ and requiring industrial power connections. You'll find them at highway rest stops and urban charging stations.
Ignore Level 3 for home use. It's not practical or economical.
Choosing a Level 2 Charger
Key Specifications
Amperage: Most home chargers run 32-48 amps. Higher amperage charges faster but requires beefier wiring. 32 amps handles most needs. 48 amps is nice-to-have but often overkill.
Cord length: 18-25 feet is standard. Consider where your charge port is and where you'll mount the charger. Measure before buying.
Hardwired vs. plug-in: Hardwired connects directly to your electrical panel. Plug-in uses a NEMA 14-50 outlet (like a dryer). Plug-in costs more for the outlet installation but lets you take the charger if you move.
Smart features: Wi-Fi connectivity enables scheduling (charge during cheap overnight rates), monitoring (track energy use), and integration with utility programs. Worth $50-$100 extra for most users.
Top Chargers in 2025
| Charger | Amps | Price | Notes |
|---|---|---|---|
| Emporia EV Charger | 48 | $399 | Best value, smart features |
| Grizzl-E Classic | 40 | $449 | Durable, cold-weather rated |
| Wallbox Pulsar Plus | 40 | $549 | Compact, good app |
| ChargePoint Home Flex | 50 | $699 | Adjustable amperage, solid app |
| JuiceBox 40 | 40 | $599 | Utility incentive compatible |
| Tesla Wall Connector | 48 | $499 | Tesla only (without adapter) |
All of these work well. Differences are marginal for most users. The Emporia offers the best value. The ChargePoint offers the most flexibility. The Tesla charger is optimized for Tesla vehicles.
Installation Costs
The charger itself is often the cheap part. Installation costs depend heavily on your electrical situation.
Best Case: $300-$500
- Your electrical panel has spare capacity
- The panel is in or near the garage
- No new wiring runs needed
- Simple permit process
An electrician adds a 240V circuit, mounts the charger, done. Half a day's work.
Typical Case: $700-$1,500
- Panel has capacity but needs a sub-panel in the garage
- Or wiring run of 30-50 feet
- Straightforward permitting
Most installations fall here. Plan for $1,000-$1,200 as a realistic budget.
Complex Case: $2,000-$4,000+
- Panel at capacity—needs upgrade to 200 amps
- Long wiring runs (basement to detached garage)
- Trenching for underground conduit
- Difficult permit jurisdictions
Panel upgrades alone run $1,500-$3,000. Add trenching and you're looking at $3,000+ for the electrical work before even buying the charger.
The Federal Tax Credit
The 30C tax credit covers 30% of home EV charger costs, including installation, up to $1,000. Some restrictions apply:
- Must be installed at your primary residence
- For the 2024-2032 period, must be in a rural or low-income census tract (this limitation sunsets for residential in some interpretations—consult a tax professional)
- Credit is non-refundable—you need tax liability to use it
If you qualify, a $1,500 installation effectively costs $1,050. Check the IRS guidelines or ask your tax preparer.
Utility Rate Optimization
Many utilities offer EV-specific rate plans with cheap overnight electricity. Examples:
| Utility | Off-Peak Rate | Off-Peak Hours |
|---|---|---|
| SCE (California) | $0.10-0.12/kWh | 12am-6am |
| Duke Energy (NC/SC) | $0.06-0.08/kWh | 12am-6am |
| Xcel Energy (CO) | $0.05-0.07/kWh | 10pm-6am |
| Con Edison (NY) | $0.09-0.12/kWh | 12am-6am |
At $0.06/kWh, charging a 60 kWh battery from 20% to 80% (36 kWh) costs $2.16. That's roughly 180 miles for the price of a fancy coffee.
Compare to gasoline: A 35 MPG car driving 180 miles at $3.50/gallon costs $18.
Smart chargers let you schedule charging during these cheap windows automatically.
Should You Install Level 2 or Stick with Level 1?
Stick with Level 1 if:
- You drive less than 40 miles daily
- You can plug in every night
- You don't have access to time-of-use rates
- Budget is tight
Install Level 2 if:
- You drive 50+ miles daily
- You need flexibility for unplanned trips
- Multiple EVs in the household
- Time-of-use rates make overnight charging attractive
- You value convenience
For most EV owners, Level 2 eventually makes sense. The question is whether to install it immediately or wait until the need becomes obvious.
Installation Process
- Get quotes from electricians. At least two, ideally three. Specify the charger you're buying and let them assess your panel and wiring needs.
- Check permits. Most jurisdictions require electrical permits for new 240V circuits. Your electrician should handle this.
- Choose your charger. Order before installation so it's ready when the electrician arrives.
- Schedule installation. Typical install takes 2-4 hours for straightforward jobs. Complex installs might take a full day.
- Inspection. After installation, an inspector verifies the work meets code. Your electrician schedules this.
Timeline: 2-4 weeks from first call to charging, depending on electrician availability and permit processing.
The Bottom Line
A Level 2 home charger costs $400-$700 for the equipment and $500-$1,500 for typical installation. After tax credits (if you qualify), you're looking at $600-$1,500 total.
That investment pays back through:
- Convenience (wake up to a full battery daily)
- Cheap overnight electricity rates
- Avoiding public charging costs and hassles
- Home value increase (buyers value EV charging)
For anyone planning to drive an EV for years, home charging infrastructure is worth installing. The sooner you do it, the sooner you stop thinking about charging entirely.
Common EV Charging Mistakes to Avoid
Based on conversations with EV owners and electricians, these are the pitfalls to watch for:
Underestimating Electrical Work
Many homeowners assume adding a charger is like adding an outlet. It's not. A 240V circuit for EV charging requires proper wire gauge, dedicated breaker, and often a new run from your electrical panel. Get a proper quote before budgeting.
Not Checking Panel Capacity
Older homes often have 100-amp or 150-amp electrical service. A 48-amp EV charger plus existing loads might exceed capacity. Have an electrician evaluate your panel before committing to a charger size. Panel upgrades add $1,500-$3,000 to your project.
Ignoring Future Needs
Even if you own one EV today, you might have two in five years. Installing wiring for a second charger now costs $200-$400 extra. Adding it later costs $800-$1,500. Think ahead.
Buying Before Measuring
That charger with an 18-foot cord won't reach your charge port if you park nose-in and the port is at the rear. Measure your parking spot, identify where the charge port is, and determine where you'll mount the charger before purchasing.
Skipping the Smart Features
Basic non-smart chargers save $100-$150 upfront. But smart chargers let you schedule charging during off-peak hours, track energy usage, and integrate with utility demand response programs. The payback on smart features often happens within the first year.
Maximizing Your Home Charging Experience
Once your charger is installed, a few habits make life easier:
Plug in every night. Even if you only used 20 miles of range, plug in. Keeping the battery topped up means you're always ready for unexpected trips.
Set a charging schedule. Program your charger or car to start charging when off-peak rates begin. Most EVs let you set departure times and will have the battery ready when you need it.
Monitor your electricity bills. Your EV adds 250-400 kWh per month for average driving. Track this against your rate structure to optimize charging timing.
Consider whole-home energy management. Smart panels like Span or DCC can share circuits between your EV charger and other large loads, potentially avoiding a panel upgrade.
The goal is invisible charging—you never think about range because your car is always ready. Home Level 2 charging achieves this for the vast majority of EV owners. The upfront investment pays dividends in convenience for years to come.